CSAT PISTOL STANDARDS: A BASELINE QUALIFICATION
The CSAT Pistol Standards is a 10-stage qualification that uses only 25 rounds of ammunition to run the test. The standards seem relatively simple, but the time standards can look relatively intimidating. Whether you are shooting from a duty holster, or running from concealment, you can pass these standards.
THE STAGES
The CSAT website says that the ten stages are designed to do three things:
A measurable standard to maintain.
An efficient stair-stepped workout program that covers all the bases.
To test the individual shooter at various times to show areas needing improvement.
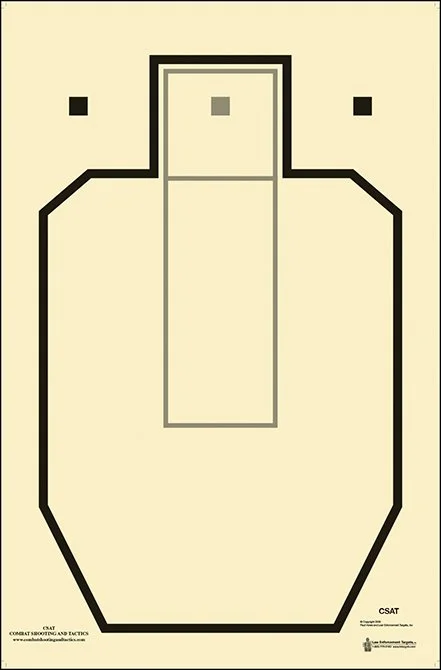
Only shots that are inside the center box and head of the CSAT target will be counted. If an enemy turns sideways, that box size will be all the shooter will have the ability to engage, resulting in the appropriate size kill zone for both straight sternum shots and side shots.
DISTANCES / STANDARDS
Ready 1 shot 1 target 7 yards 1 SEC
Holster 1 shot 1 target 7 yards 1.7 SEC
Ready 2 shots 1 target 7 yards 1.5 SEC
Ready 5/1 shots 1 target 7 yards 3 SEC
Ready 4 shots 2x target 7 yards 3 SEC
Ready 4 shots 2x weak/2x strong (1target) 5 SEC
Ready 1 shot Malfunction drill (1 target) 3 SEC
Ready 4 shots 2 Reload 2 (1 target) 5 SEC
Rifle up 1 shot Dry fire/transition 3.25
Holster 1 shot Kneeling (1 target) 25 yards 3.25
Total: 25 Rounds
In order to become an instructor, you have to pass 8 out of the 10 stages. Any shots that land outside the intended box will render the entire stage a fail. All stations are shot at 7 yards except for the 10th stage.
SHOOTING THE TEST
I personally ran this course of fire with my MEUSOC 1911 from the Military Armament Corporation. Prior to trying this out, I spent some time trying out some “predictive shooting”, and figured I would try to blend that into the course of fire when multiple rounds were needed. I do no recommend this, but it did pay off for me by giving me impressive times on some of the stages.
For this course of fire, I shot all the 7-yard stages at 10 yards instead because the terrain in front did not allow a closer distance. When I took this test, I did not anticipate that I would perform too well since I was already showing signs of fatigue through wrist cramps, tremors, and spasms. These are not slews of excuses, but rather facts about the conditions I voluntarily conducted this test under.
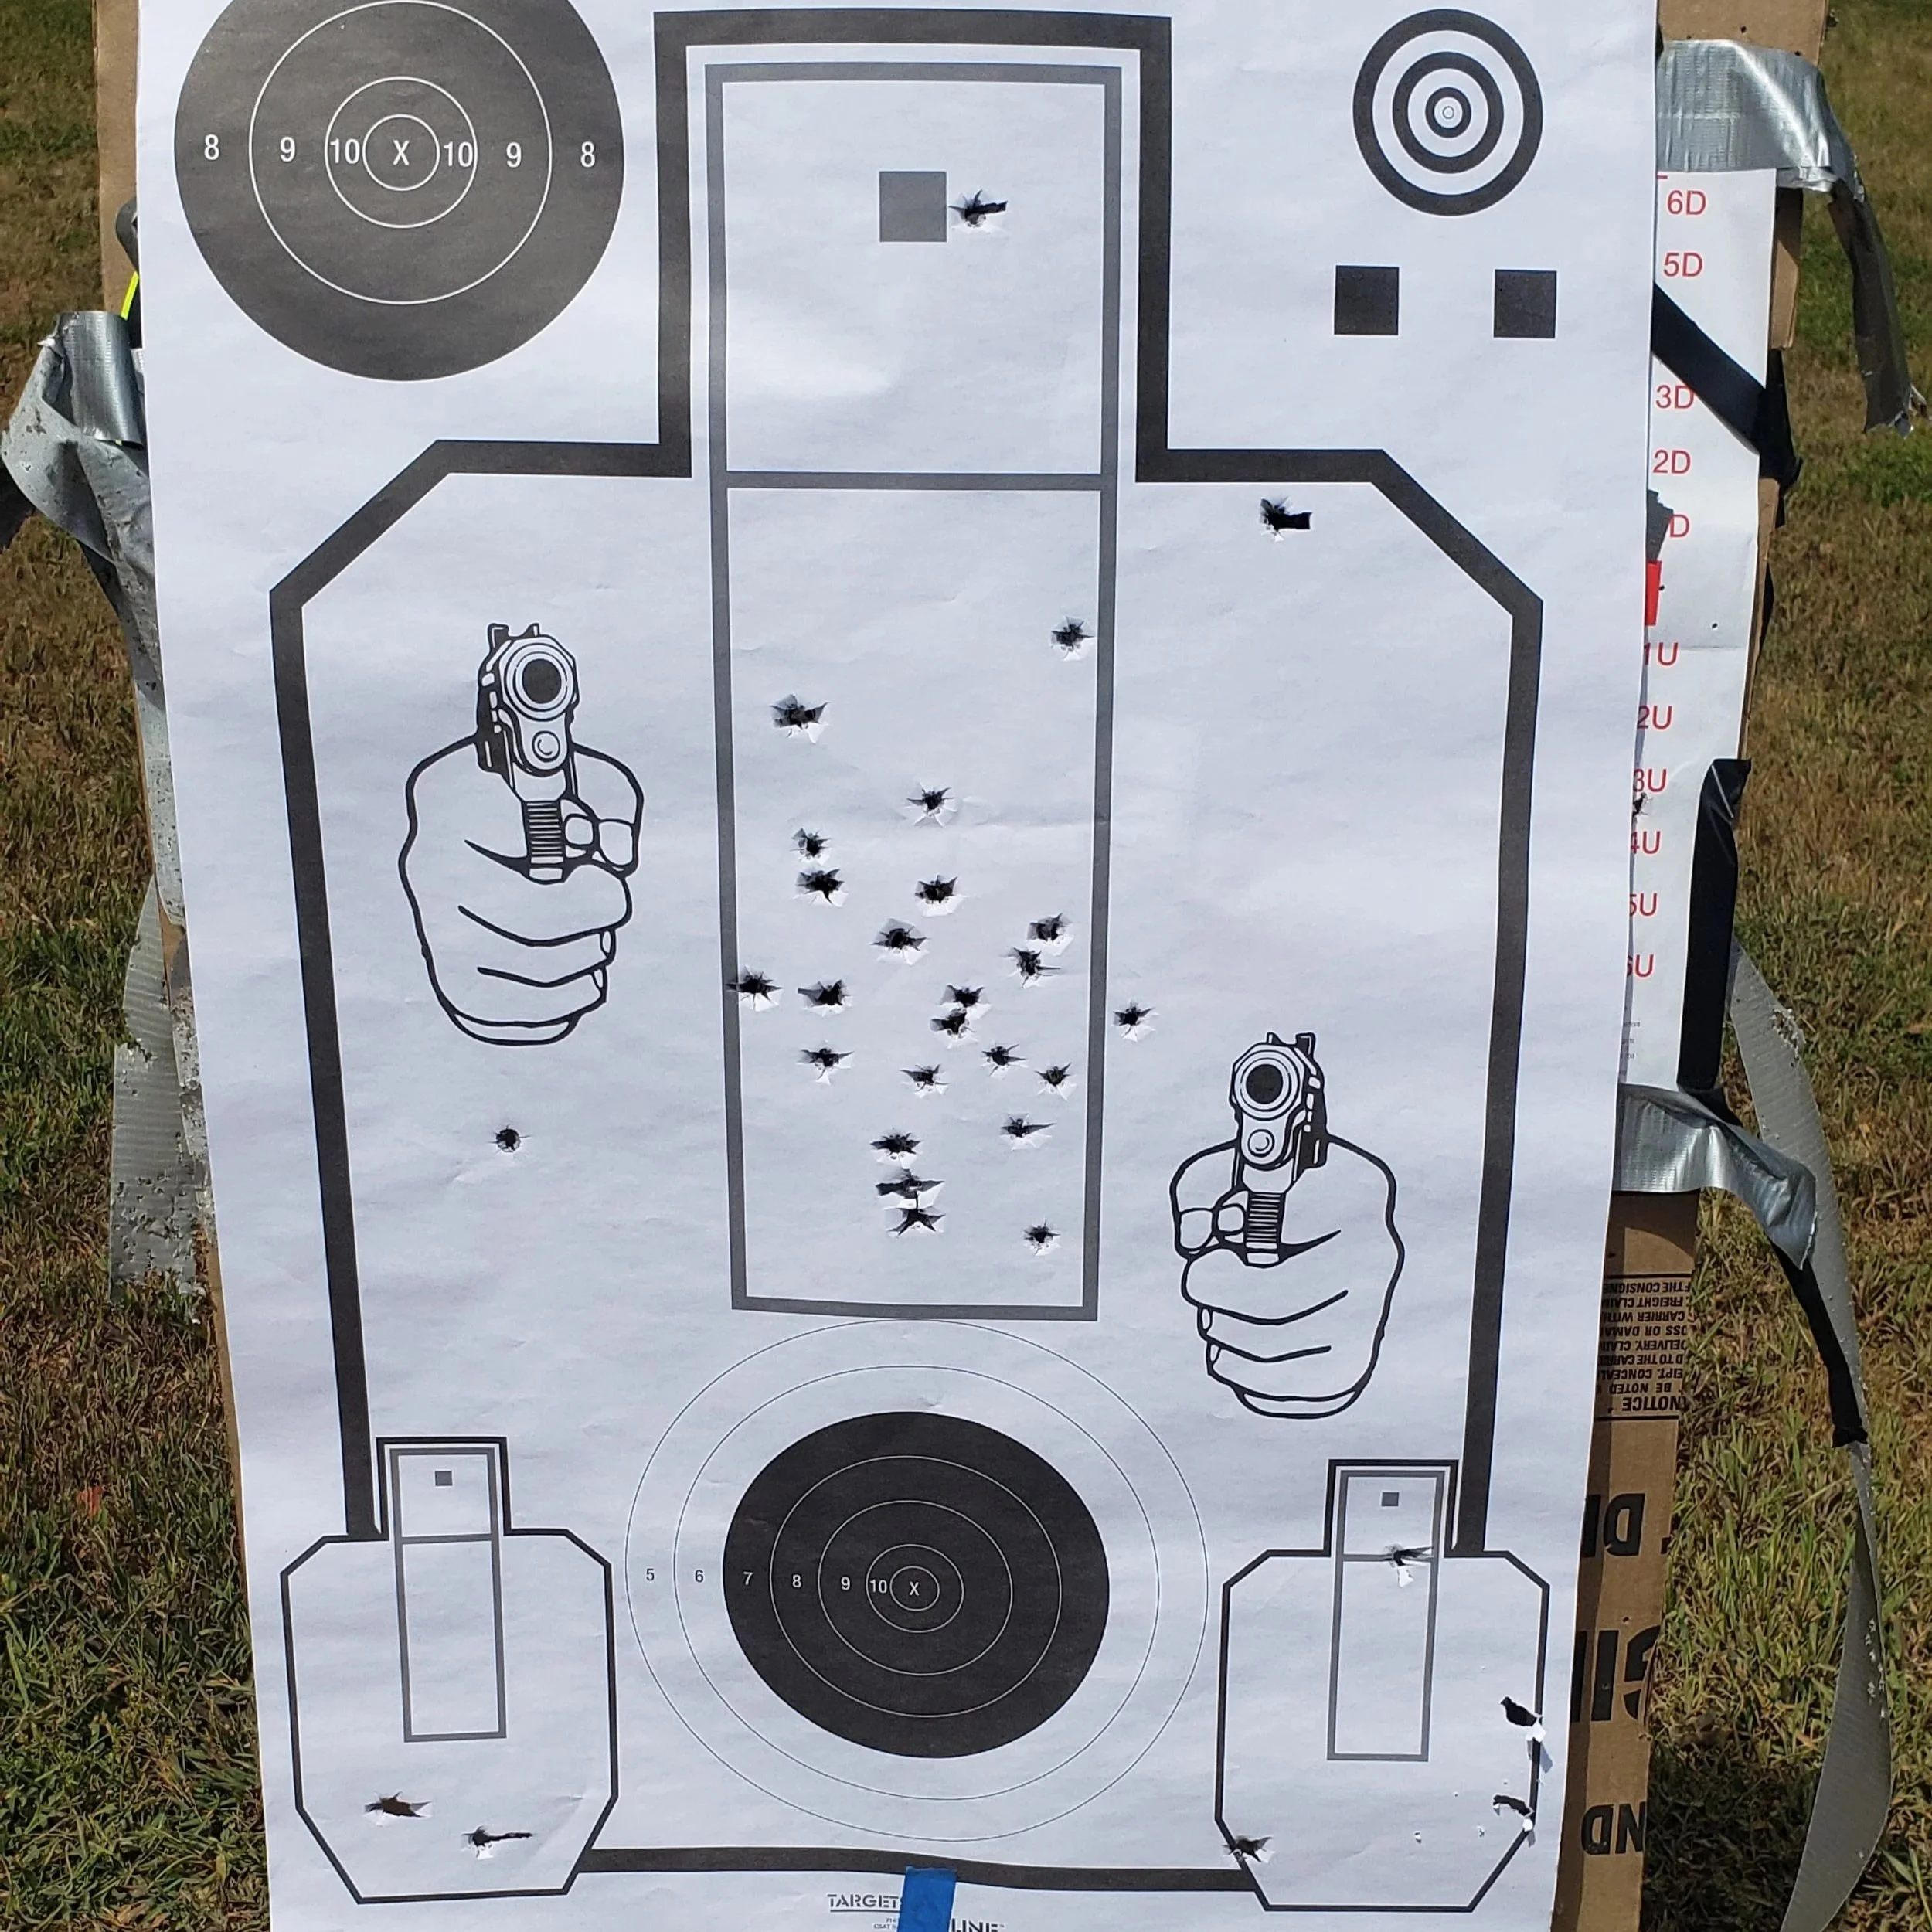
Below are the results of each stage:
STAGE 1. Ready 1 shot 1 target 10 yards 0.6 SEC
This own was pulled low but in the box. I could easily improve on my trigger control and grip control in the future.
STAGE 2. Holster 1 shot 1 target 10 yards 1.62 SEC
I pushed the speed and yanked a shot as soon as my sights were somewhat in the box, and my shot was in but high. I can get speed, but I need to be faster to SEE my sight picture and stage my finger on the trigger on the press out portion of the draw.
STAGE 3. Ready 2 shots 1 target 10 yards 0.9 SEC
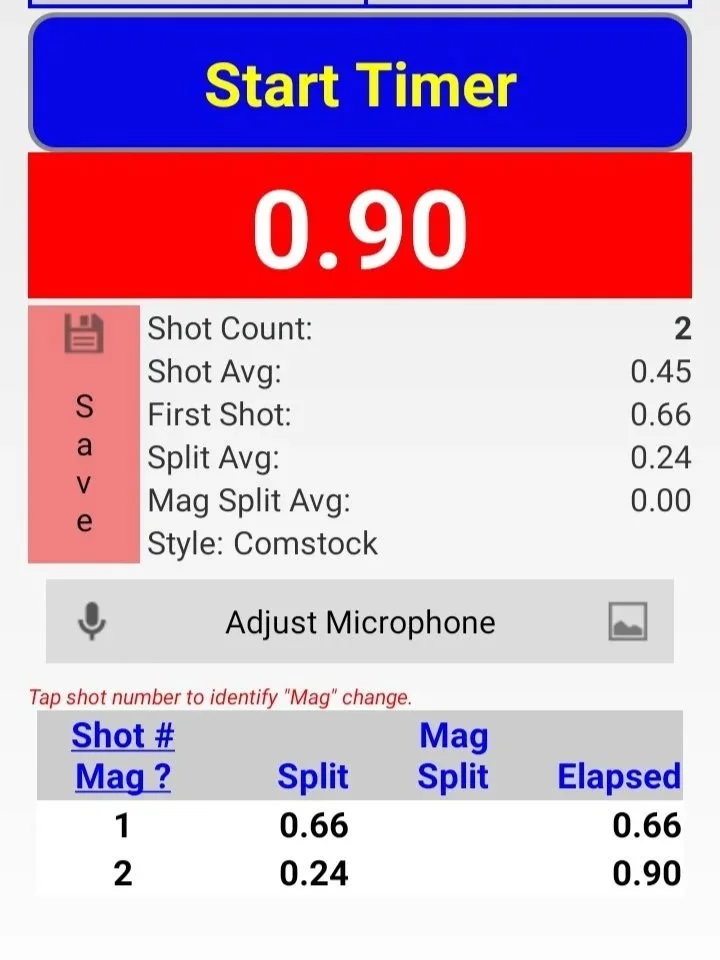
This was done using predictive shooting, and the shots were very close to each other. This was not necessary, and I will be sure to make sure I can see my sights next time.
STAGE 4. Ready 5/1 shots 1 target 10 yards 2.9 SEC
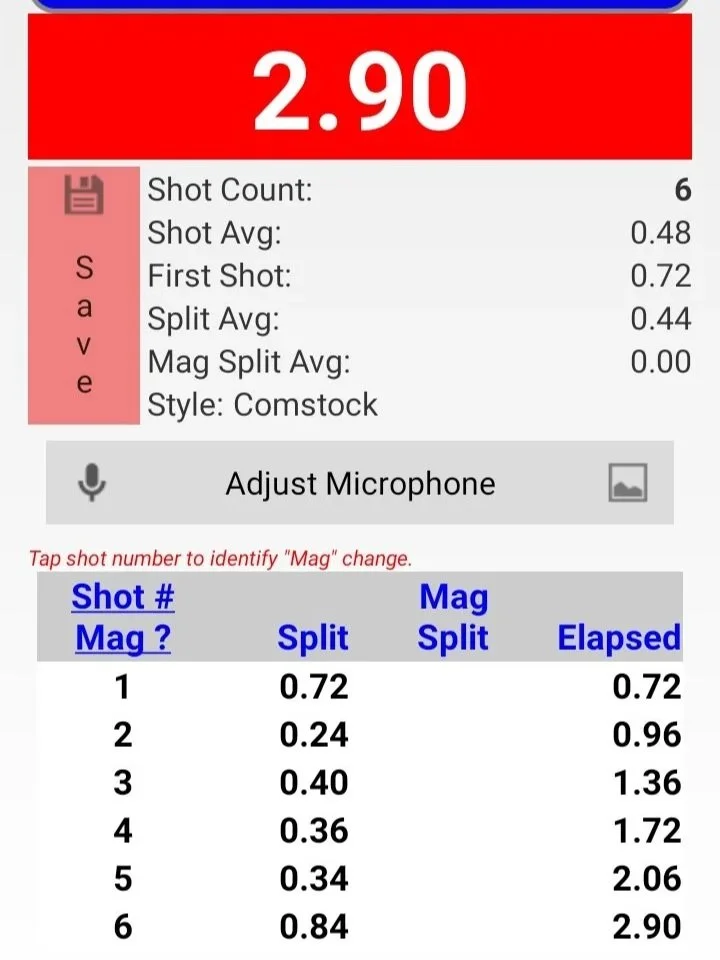
I used predictive fire and then took a careful shot to the head, and had good success, but only barely. This was probably the best technique for this type of shooting.
STAGE 5. Ready 4 shots 2 to L target, 2 R target 10 yards 1.88 SEC
The first pair was predictive fire, as was the second pair. I barely got the first shot on the left side of the mini target, but my scattered and fast pair were in.
STAGE 6. Ready 4 shots 2x weak/2x strong (1target) 5.16 SEC FAIL!
I suddenly got blurred vision right on the beep and it took a second to get my sight back. All were in the box and well-aimed since I know how fragile one-handed shooting can be.
STAGE 7. Ready 1 shot Malfunction drill (1 target) 1.92 SEC
This process was done clean and I saw everything I needed to see.
STAGE 8. Ready 4 shots 2 Reload 2 (1 target) 4.22 SEC FAIL!
I missed the second shot far off to the left, but slowed down after the reload and hammered two rounds fast into the box in a total of 3.6 seconds. I reshot this stage and had a perfectly clean run in 4.22 seconds
STAGE 9. Air Rifle up 1 shot Dry fire/transition 2.32 SEC
I ran this stage clean with a good sight picture.
STAGE 10. Holster 1 shot Kneeling (1 target) 25 yards 2.42 FAIL!

I tossed my first shot high and to the right, and honestly didn’t even confirm my sights were on, grazing the shoulder in 1.9 seconds. I reshot this stage and missed just off to the right of the box, failing again in 3.22 seconds. I did this stage a third time and ran it clean in a short time. I was shaking like a leaf after all the shooting and dry practice, and I attribute my shot making it to random chance.
LESSONS LEARNED
I would say that I have a lot of stuff to work on, but I am headed in the right direction. I usually use tiny 2.5”X2.5” sticker target squares when I shoot so that I am aiming nice and small, demanding a bit more precision. I found myself having relatively slow draw and presentation times in the past when I was demanding absolute precision. This concerned me initially until I saw the target box size, relative to the range I was shooting at. In comparison to the target size I am used to, the box was huge.
I was particularly surprised that I was able to squeeze out the draw times I did. I barely saw what I needed to see, and barely had a tight grip on the pistol when I cracked the shot. One of the things I think I could benefit from greatly, is more distance shooting. I found that distance shooting adds a greater spread and forces more concentration than shooting tiny groups from a closer distance.
One of the other things that bothered me about this test was my performance with controlling my grip and trigger. I was putting a lot of muscle into my shooting hand and forgetting to use only my support hand to SUPPORT and CONTROL the recoil. This issue had my hand tossing the shots all over the place, and low. This was poor marksmanship by my standards, despite how well it may seem.
During the target transitions, my impatience got the better of me and I spread my shots unacceptably wide. It felt like the first target got good aimed fire while the second target got the equivalent of “spray and pray”, which is absolutely unacceptable for me. I will have to work on this concept specifically.
Timers have a tendency to induce stress and give us a false sense of time. This is fine, but also, we are missing visual indicators that would help prepare us for the real world. To remedy this, I typically use my imagination and try to visualize threat indicators like a gun or knife to practice the focal shift from weapon to center mass/spinal box.
WRAPUP
The CSAT Pistol standards are not impossible. But it definitely gives you a clear idea of what you are strong and weak on. It will take you a half a box of ammunition to take this test, and it will take a total of about 5 minutes to do it. It is very interesting to see what you are capable of, especially if you modify the range at which you perform the test.